Sunday, December 30, 2012

Fire place and Rifle Fire

Bad weather makes for a productive day, gaming, painting and blogging wise. So why not turn on the fireplace channel and do some gaming?

The fireplace channel. The tackiest Christmas tradition ever, but at least
they play nice seasonal music!

Bolt Action, 440 points, Maximum Attrition scenario. Maximum attrition isn't really a scenario at all, it's just a contest to blow away the most foes. I think I can handle that.

USA Reinforced Platoon
1. 2nd LT plus 2 men.
2. Bazooka Team
3. Squad A: 12 men, 2 SMG, 1 Browning Automatic Rifle
4. Squad B: Same as above.

German Reinforced Platoon, with Armour Assets
1. Leutnant with 2 men.
2. Wehrmacht Squad, 10 Men and 2 MG42's.
3. Panzer II #113
4. Panzer II #114

The opposing platoons enter the battlefield. Americans on the
left, Germans on the right.
Turn 1: American Squads A+B enter, each heading for forest cover. The Wehrmacht squad does the same on their side. Panzer 113 gets a line of sight on Squad A, killing 1. Panzer 114 attacks Squad B, killing 2 including the BAR. The Bazooka enters the battlefield and fires on Panzer 113, missing it and leaving themselves in a very exposed position.

Turn 2: Panzer 113 blasts the bazooka team, killing the loader but the other guy survives. He immediately returns fire, blowing panzer 113 sky high! SquadA advances, killing the MG42 in the German squad. The wehrmacht fire back, killing 3 yanks in squad A.

Squad A on the left trades fire with the germans on the right for the
rest of the game.
Turn 3: Squad B runs around behind the large central hill to avoid panzer 114. Panzer 114 pursues and shoots but misses.

Turn 4: Squad B runs the rest of the way around the hill to fire at the german infantry. Squad A tries to rally but hits the dirt instead. The bazooka man sets an ambush for the panzer should it come any farther around the hill.

Turn 5: Panzer 114 drives around the friendly side of the central hill to avoid bazooka fire, only to be assaulted by squad B with tank grenades! However the assault fails.

Squad B bravely assaults the tank, but fails to harm it.

Turn 6 (final turn): Panzer 114 sprays Squad B with MMG fire for 3 kills, but fails to break the unit.

The game was over. In Maximum Attrition, each side gets 1 point for each unit destroyed. The yanks destroyed 1 unit (panzer 113) while the germans damaged several units but didn't destroy any. The score is 1-0, not a big enough advantage for a win, so call this one a draw. A fun game nonetheless.

The Wehrmacht stands strong, their Leutnant right behind them. Squad
B is in the forest in the background, with Panzer 114 barely
visible beyond them. 


The Weather Outside is Frightful...

...but wargames are so delightful.

Stormy weather so why not stay in with a wargame?
Probably not a good day to go to the beach.
The Game: Bolt Action
The Scenario: Envelopment (Americans attacking Germans)
Game Size: 450 pts.

US Platoon
Veteran 1st LT and 1 extra man
12 man veteran squad with 4 SMG and 2 BAR, plus Anti-tank grenades
Veteran Bazooka Team
Veteran Sniper Team

German Platoon
Leutnant with 2 extra men (All germans rated regular)
Wehrmacht infantry squad with 10 men and 2 MG42.
Two Panzer II's.

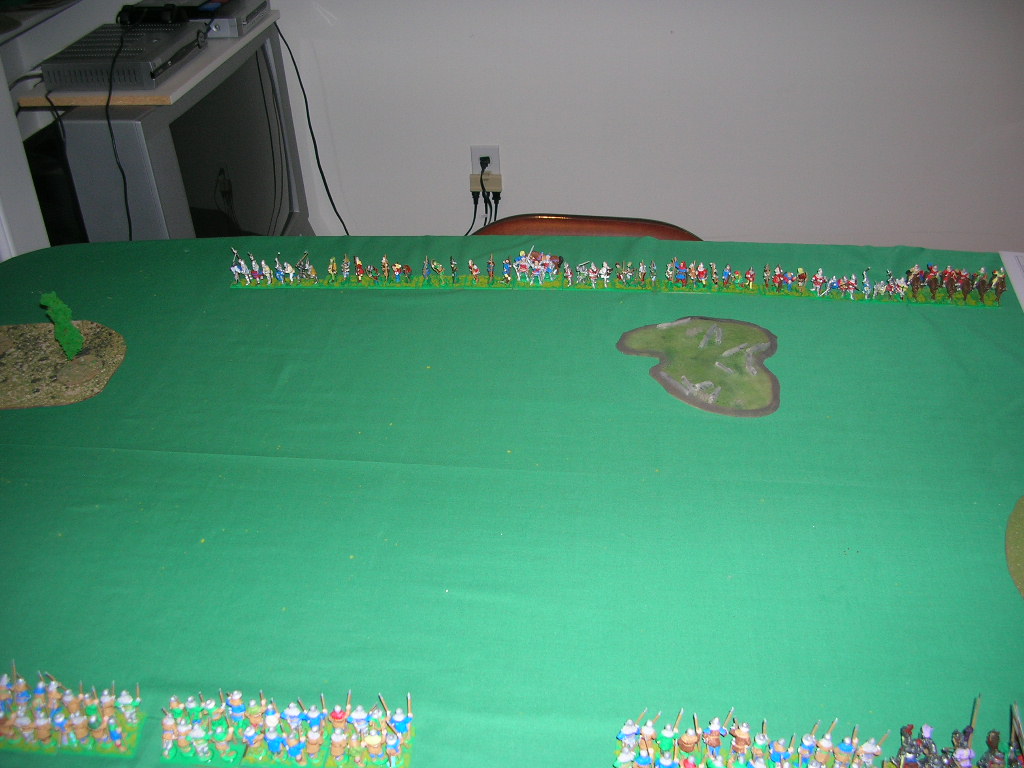
Germans deployed. From closest to farthest: Panzer II, Squad and Leutnant,
then other Panzer II at the far end of the table.
In this mission, it's up to the Americans to move as many troops into the german deployment zone, or even better right through it off the table, by the end of the game.
Things started off with a prepatory bombardment, giving a pin marker to all german units. Perhaps some Germans should have been kept in reserve? Then the American first wave arrived and things really got started.

Turn 1: The American Squad runs right up the middle of the table. The Panzer II in the german centre opens up with its MMG, but misses completely. The more distant panzer then fired likewise, killing a single american. 

The Americans charge towards the german lines. The main squad and
LT are in the centre, sniper team below them and bazooka team in
the foreground.
Turn 2: Both panzers fire their MMG's on the yanks, killing one and adding more pin markers. The Bazooka team advances around the woods, looking for a clean shot on a panzer. The sniper makes a long range shot, killing a german MG42 soldat.

The Bazooka team looking for a clean shot.
Turn 3: The Bazooka team fires at a panzer, missing it. The panzer fires back, killing the bazooka teams loader. The american squad runs blindly right ahead into the forest, a foolish move. The Germans advance to point blank range are let 'er rip, killing a whopping 8 americans. The lone survivor, Pvt Smith, makes his morale test and holds on.
The americans, heedless of danger, charge right into the massed fire of the
germans.

Turn 4: The lone Bazooka man fires at the panzer, hits it for maximum damage and it explodes! Things are looking up for the yanks. The wehrmacht squad fires at lonely Pvt Smith, and even with so much fire power only manage to hit him once. He's out of the game, but crawls back to safety and claims his purple heart. 

Pvt Smith vs. a ton of Jerries.
Turn 5: The American 1st LT runs right through the german deployment zone, followed quickly by the sniper team. They made it because of the distraction caused by Pvt Smith holding out, as well as the panzer previously destroyed by bazooka. This scores victory points for the americans. The lone bazooka man fails an order test and hits the dirt - just in time because that saves him from incoming fire. The remaining panzer obviously respects the bazooka, for he too fails an order test, reversing at top speed away.

Turn 6: The bazooka man hits the dirt once more, intimidated by having to face the german platoon plus panzer alone.

Turn 7: The bazooka man fires one last time at the panzer, hoping for a lucky shot but his rocket falls short. The wehrmacht squad approaches and opens fire, thus ending the game. All american units are either destroyed or have advanced right through the German deployment zone. Now lets add up the points and see who won!

The brave and lonely bazooka man faces off against Fritz alone.
The germans get two points for every unit destroyed. That was the bazooka team and infantry squad, so the Germans score 4 points. The Americans get 1 point for destroyed units and three for each unit advancing off the table, so 1 point for the panzer destroyed, 3 points for the LT advancing and 3 more for the sniper, for a total of 7 points! The difference in scores is 2 or greater, so the Americans have won. 

That was a really fun game. After the main american infantry squad was destroyed by my stupid move, I thought the game was over but the yanks persevered and won the battle. Thanks for reading!


Thursday, December 27, 2012

Hold for Reinforcements again

My second game of Bolt Action. I rolled up an identical scenario with the Germans defending once again. The Bridge had to be held, the side with a unit within 3" of it at the end of the battle wins, unless both armies claim it in which case it is a draw.

Americans:
1. Veteran 2nd LT and two riflemen.
2. Veteran Sniper Team
3. 5 man squad, 2 SMG, Browning Automatic Rifle and Tank Grenades
4. 5 man squad, 2 SMG and tank grenades

Germans:
1. 2nd Lieutenant and 2 extra men.
2. Panzer II
3. 8 man squad, 1 MG42 LMG, 2 SMG.

Both armies are approximetely 300 pts. A small starter sized game.

Another battle, another bridge. Germans on the right with a large squad in the
woods, a 2nd LT and two riflemen nearby. Americans behind the NW woods and
SW woods.
Turn 1: The American squad in the NW woods opens fire on the germans, all missing. The germans could not score a casualty either. The american sniper also missed. Then the German Panzer II arrived, fired at the americans with an HE shell, and killed 1 yank.

The Panzer II arrives from the east to fight the large number of
americans in the far woods.

Turn 2: The Panzer II fired its MMG this time, but missed all 4 shots. The other germans missed as well and the american sniper couldn't hit the broadside of a barn. The large american squad successfully rallied, removing it's pin markers.

Turn 3: The southern US squad took the bridge. The Panzer fired it's MMG at them but missed because of the heavy stone railing of the bridge. The US squad advanced on the tank, then fired on the germans in the woods, killing one rifleman and took out the MG42. 6 German riflemen advanced on the bridge and fired at the americans there at point blank range, but only caused one kill.

Americans and germans engage in point blank fire for control of
the bridge.
Turn 4: The yank squad on the bridge fired across it at their german foes, killing two. The Panzer MMG killed a single american. The germans at the bridge tried to rally but went down instead. A brave american squad tried to assault the panzer, but a FUBAR result made them run away. The americans on the bridge were wiped out by lucky firing from the german LT and his riflemen.

Turn 5: The Panzer's MMG totally missed its US targets. The Germans on the bridge rallied. They weren't going anywhere. One US squad failed its order test while two others missed all shots.

Turn 6: The Panzer scored a lucky hit killing the american LT. A US squad made a desperate run at the bridge, reaching the foot of it. The roll for an extra turn was failed, so the game was over.

The end of the game, americans and germans face off across the bridge.
Both armies had men within 3" of the bridge objective, so the game was a draw!

It was fun to use my new tank. I also like how the game lasted all 6 turns without one side getting wiped out before hand like in my last game (though that was mostly because I got some rules wrong). A fun game and I look forward to playing more Bolt action.

Tuesday, December 25, 2012

Bolt Action

I was conservatively hoping to play a game of Bolt Action by January, but lucky me, I have (barely) enough figures painted to play a starter game here on Christmas! So stuffed full of stuffing, I got to play my first game in a whole new period.

I rolled up a "Hold for Reinforcements" scenario. The Germans were the defenders, the Americans the attackers. Whoever had possession of the vital bridge at the end of the game was the winner.

The Americans had: A 2nd lientenant with two men, a six man squad with 2 SMG's, a 7 man squad with 2 SMG's and LMG, and a sniper team.

The Germans had: 2nd lieutenant with two men and 3 squads each with 4 rifles and an LMG team.

The vital bridge is in the centre. The Germans are on the left, except for
Americans in the far back left, and Americans on the right. The US sniper
team is on the bottom right.
Turn 1: The US sniper fires at the germans to the south of the bridge, missing but still adding a pin marker. That german unit then fired it's MG42 LMG and rifles, killing many americans in the back far left, the rest promptly scattered.

Turn 2: The US sniper targeted the same unit again, this time killing the MG42 gunner who had just slain his buddies. The Germans in the forest got ambush orders. The Americans advanced into shooting range and the germans sprang their ambush, killing several. American return fire killed two germans. The german unit by the hedges was ordered forward but failed an order test and hit the dirt instead. Their morale was low because of the sniper fire.

Turn 3: The sniper plugged another german, whose unit then rallied. The german and american units in the forests traded fire.

Turn 4: The germans took possession of the bridge, another unit killed the sniper and the remaining americans were slaughtered by their german foes. The only remaining american was the LT, who make a strategic withdrawal. Germans win!

The germans who took the bridge.

Two german squads in the woods.
An M26 tactical dice cup, manufactured by Yoplait Industries.
A fun first game. I'll read through the rules again now that I'm more familiar with how things work. It'll be fun to add tanks and buildings to the game. Obviously I need more figures to bulk up my armies, and that'll be my project for the next while. Thanks for reading and Merry Christmas!

Friday, December 21, 2012

Blood on Haggis Moor

Time for Henry V to try and get some revenge on those dastardly Scots. This is an 800pt wrg 6th game fought between a Scots Common army and an English Hundred Years War   army.

The Scottish Army consists of :
1. Earl Angus of Haggis Moor, PA and 10 SHK Irr C knights.
2. 6 Sergeants Irr C HI
3. 24 Spearmen Irr C MI LTS Sh Mtd. on Pony (Mounted infantry)
4. Same as 3
5. Same as 3

The English:
1. King Henry and 7 SHK Reg B men at arms, all fighting dismounted.
2. 8 men @ arms as above.
3. Like 2
4. 6 Hobilars Irr C MC
5. 16 Archers LMI Reg C 2HCW (giving them a big boost in hand to hand)
6. As 5

A group of doughty Scots.


The Armies laid out: English in the distance, Scots up front. The English
are (left to right) m@a, archers, m@a+Henry, archers, m@a, Hobilars. The Scottish are Sergeants
(off camera to the left), Spearmen, Spearmen, Spearmen, Scottish SHK knights.

This game will last for 6 turns.

Turn 1: The Scottish army approaches, and English archers shoot 26 of them.

Turn 2: The 220 Scottish knights charge into (and are counter-charged by) 120 Hobilars. Archery was inneffective, but 4 Scots knights were killed and a few more spearmen. The Scots knights inflicted a whopping 45 causalties on the Hobilars who only did 4 in return. They broke, naturally.

Scottish knights fighting the Hobilars. Why is the Scottish standard the
St. Georges cross? Historians would be outraged.
Turn 3: This turn the English archers kill 31 spearmen, and 5 knights. There were no melees this turn.

Turn 4: Scots knights charge english men at arms and two units of spearmen charge the rest of the english line. The Hobilars flee the table. The English m@a recoil the Scottish Knights of Earl Angus. Both spearmen units - including one which is impetuous - recoil. Their men at arm foes follow them up but the archers decide not to. A mistake, as it turns out.

Turn 5: The spearmen who weren't followed up charge right back into the foe. The spearmen who had been blocked by the swamp finally arrive within charge range of the English lines, but fail their reaction test to charge. The English men at arms push back the Scottish Knights once more, and since they are only C class, they break and flee, taking Earl Angus and his army standard with them! A major blow against the pride of Scotland. A group of spearmen fighting another body of m@a break as well.

Turn 6: The Scottish sergeants on the far left of their line finally clear the forest, turn and charge some men at arms in the flank, breaking them, but not before those same men at arms break a group of spearmen. Another unit of spearmen break their archer foes.
The battlefield at the end of the game. Ignore those Hobilars in the
foreground, they snuck back in when no one was looking.
Final Score: England 444 vs. Scotland 278. A clear victory for England. King Henry says "Jolly good, now lets get back to the war in France. Much better wine there."

Tuesday, December 18, 2012

Throwdown in Britain

Fresh after getting his royal butt handed to him in his last battle, Henry V decides to fight a sensible battle against the Scots. He decided it would be easier than trying to figure out where the swiss obtained their navy for the last battle.

I finally finished enough figures for my Scottish army. I had to paint 72 spearmen, and even by buying all possible upgrades for them that's barely enough to field a full sized army in WRG 6th edition. This battle will be 1000pts.

The Scots are lead by Angus Archibald MacDougal McDonald, 3rd Earl of Haggis Moor.
He leads a unit of SHK with 200 men. There are 240 feudal archers, 120 sergeants and 1440 spearmen spread into 3 units. I love 1:20 troop scale, it makes my armies seem so much bigger!

The invaders are lead by Henry V. His royal guard is 240 men at arms (dismounted as are all the english men at arms), 320 regular men at arms in 2 units, 1920 archers divided into 4 units are interspersed amongst among the men at arms, 120 Hobilars who have never accomplished a darn thing in any of the battles I've ever used them in. I don't mean to give away the plot but they fight true to from today.

The English Army. It may not look much but that's 6 feet of solid lead.

The Scottish army. The sergeants are off camera to the left.
 The English placed a swamp on their left to try and slow down the Scots. The Scottish placed hills to shield themselves from archery, at least for a while. The Scots outscouted the English, forcing them to deploy first.

To start the game the Scots were all mounted on ponies. This gave them a big movement boost in their first turn before them dismounted to fight on foot.

The Scots make a big leap forward before the spearmen dismount.

English archery kills a few dozen Scots at long range. The Scottish sergeants charged the English archers on their left flank, but the arrow storm was too much for them and they broke. A mighty cheer broke out from the English lines, but it was premature. The Scottish knights, determined to outshine the lower class sergeants, charge into the English centre, pushing back archers and men at arms. The English hobilars charged downhill at group of spearmen, but the spearmen planted their spear butts on the ground and the Hobilars were impaled, taking a whopping 90 causalties (out of 120 men starting out), broke and never recovered.  
The Scottish knights, sporting the latest in Italian armour and headgear, break the
English centre.
The Scottish knights charged the centre again, leaving the troops there shaken. The English then lost the combat, broke, and started a chain reaction that caused most of their army, Henry V included, to run south and towards home as fast as they could.

Game over, victory Scotland. The few remaining English could have held on a few more turns perhaps, but victory was just not an option. So my Scottish get to win on their first big outing.

WRG 6th rulebook (Modern reprint), Army lists books 2 and 3 (originals
bought online and in great condition) plus the QRS from the
Yahoo group.


My stat sheet from the game. WRG 6th requires a lot of notes.
Something cool happened today, every wargamers favourite visitor: The mailman!
I love the mailman. He's like Santa, but all year around. And
you don't have to sit on his lap. Unless you want to of course.
And what did he have for me but this badboy:
I got the Starter set which has not only this hardcover rulebook but 40 plastic figures to get going. I hope to play my first game in January, it's looking very WWII for now! Warlord was kind enough to include a picture showing which weapon is which, so a newbie like me can tell his MG42 from his Walther.

One final point: Border Services charged me a whopping $40 to get my package. They charged tax at a value of $200, even though the package was clearly marked $128. Does anybody understand the goverment? Well, money well spent if it gets me started on my World War II stuff just in time for Christmas.

A longer post than most, thanks for reading!

Sunday, December 16, 2012

Field of Glory - English vs. Swiss

I was at a pub today, which had a bunch of european flags hanging on the wall. Europe makes me think of the middle ages, so I decided to have a medieval game of Field of Glory, HYW English vs. Swiss. Funny, neither of those nations flags was in the pub. Any excuse for a game.

Henry V woke up one morning and was surprised to find that Switzerland had invaded England. "Blimey" said Henry, "Makes a nice change from killing French guys all the time, guvnor. Let's teach these overly-neutral blokes how we win wars here in merry old England. For God, me, and St. George!"

I choose 500 pts a side, a small game for Field of Glory but I'm using 28mm figures on a 6x3 table. Most FoG games are played in 15mm.

England: 2 BG's of 4 Dismounted men at arms each. 3 BG's of 8 Longbowmen each. Deployed in classic archers/m@a/archers, the way we all know and love.

Switzerland: 4 BG's of 8 pikemen each, a BG of 8 light crossbowmen and another of 8 light hand gunners. They deployed all of their pikes in the centre with a light unit on each side.

Note that I'm talking bases, not individual figures. Heavy troops are 4 to a base, lights troop bases have 2 each.

English on the left, Swiss on the right. The swiss had to deploy in some
fields which slowed them down but didn't affect their fighting prowess.
The house at the far end is a village.
Henry V, two of his captains and in the back a page holding a horse.
He counts as an Inspired Commander.
Cry Havoc and let slip the dogs of war! This dog, being a terrier of
Scottish descent, is obviously against the English. Plus one of his
ancestors is German so that makes him like the Swiss even more.
The Swiss army. Look at all those pikes, good for sticking
Englishmen.
The English army, not looking terribly threatening at all.
Plus they're all having tea.
Several turns pass as the armies get close enough to fight. The Swiss are hampered by the fields they deployed in. On the other hand, the English have no stakes so are free to advance. When they get a little closer the English archers on their left flank fragment then break the Swiss crossbowmen. On the other hand, the English must have forgotten how deadly their longbows are supposed to be because they accomplish nothing at all except breaking the Swiss crossbows. The deadly Swiss pikes enter combat fresh and ready to rumble.
The two armies, ready to get physical.
The dreaded Swiss pikeman finally charge, immediately fragmenting the right flank archers. In the melee those same archers are then broken and flee, while the archers on the other flank are soon broken as well.
These pikemen smash right through the English army and
march on the English camp.
At this point it's rather bleak for Henry. Two broken units means he is at 4/5 attrition points, while the Swiss are only at 2/6 from their broken light crossbow. Henry frantically redeploys men at arms, and leads his own unit from the front. Alas it is not to be, one unit of men at arms simply bounces off their pikemen foes, while Henrys front line heroics have no effect on the combat at all. The pikemen pictured above march directly into the English camp, scoring 2 Attrition points and winning the battle. Victory Switzerland! The Swiss peasant army then makes all of England eat delicious chocolate, go skiing, and use "knives" that really have 249 different tools in them. That'll teach 'em.


Monday, November 26, 2012

Review of Dark Heaven Apocalypse


Thanks for your email Private wierd, here's a mini-review of DHA for anyone interested.

In DHA every figure has a class, from 1 to 4. Class 1 are the fastest figures, unarmoured flyers. Class 2 is light infantry, and so on to class 4 which is heavy infantry. Every turn you roll for initiative for every player, then the winner moves, shoots and fights with all his class 1 figures, then the player with the second highest initiative does the same and so on for all players, as many players each on their own side as you like. Then of course everybody acts with their class 2 in sequence and so on to class 4's. If your army is mostly class 4 you'll be constantly out-maneuvered by the lighter troops.

All combat and missile fire is an opposed roll, a single d10 is rolled for each figure with stats and a few mods added on to that. In melee the loser is removed, making for very quick battles. You roll for all enemies in base contact until no opposing figures are still touching. Missile fire is a similar opposed roll, if the shooter wins the target is killed, otherwise the shooter misses. Heroes and monsters have a special save factor that lessens the chance they'll be slain from one lucky shot. Another point is this games favour is that there is no record keeping at all. You'll need a sheet to record your stats of course, but once the game starts you won't ever need a pencil or scratch paper.

Spells are also conducted with opposed rolls. Different spells have different penalties to casting depending on how powerful they are. I love this game but the spell system is a bit weak, a lot of the spells are variations on magic missiles, with a few that are more unique.

Where DHA shines is the fact that battles are quick, even with lots of figures. And probably the best part is the simple points system that lets you make stats for any figure you own, meaning anyone with a warhammer army has tons of figures perfectly suited for this game already.

Finding a copy might be hard, DHA was never hugely popular. Reaper Miniatures used to have an earlier version of the game available on their website that was very similar, though I haven't played that version. I can't find it on their site right now, but it must be floating around somewhere.

Anyway, hoped you enjoyed reading this!

Wednesday, November 21, 2012

Dark Heaven Apocalypse

Here's a real blast from the past, one of my old favourite games: Dark Heaven Apocalypse, by Reaper Miniatures. I played this game heavily until I got into Warhammer 6th edition.

Rulebook and box it came in. The box also had 8 metal miniatures, quick reference sheet,
and a short novel, as well as 2 ten sided dice.
DHA was designed to be generic, and using a simple points system you pick the stats for all your figures, using any figures you happen to own. Half the rulebook is also given over to detailing the world of Avalorr, an optional place for setting your games. It's very detailed with many nations and descriptions of characters with stats. I put up a webpage for this game, back when the web was fairly new and you had to know some HTML to make a webpage. No blogger back then! The online DHA community consisted of my page and two others. That was it.

I wanted to use the beastmen I've been painting lately, so I made stats for them, basing them off black orcs. They were also joined by some suitably powerful chaos knights, "Death Bringer" the mighty evil champion and Malagor the beastman wizard. 5 Chaos Knights, 24 Beastmen and the two characters makes 1683 pts.

They were opposed by the goodly elves, led by Cedric the wizard, joined by 16 archers and 10 Swordmasters. Archery is very deadly in this game, and archers cost many more points than regular infantry. The elves totaled 1646 pts, close enough.

The battle of Vlenden was fought amongst the village of the same name, deserted by the inhabitants when they heard that the horrible Death Bringer and his demented servants were on the way. Battle was swiftly joined.

The beasts had no missile troops, and suffered heavily while advancing into the elvish longbows. Malagor and Cedric cast spells with some effect. Between missile shots and spells, Death Bringer and his beasts were destroyed, only killing a few swordmasters in return. Malagor and his beasts fared a little better but in the end all were killed by spells or arrows by the end of the game. Elvish losses consisted of all 10 swordmasters (most killed by the Death Bringer) and a few archers lost to Malagors magic.

View from the elvish lines, mid game. Cedric leads his troops from atop
his hill, while Death Bringer and his two remaining beasts advance.
Malagor and his beasts are advancing around the house on the right.

A fun game, and quick! DHA games are played to a definite finish (i.e. all of one side wiped out) in a fraction of the time of other games. I've never done it but the designers claim that massive battles with hundreds of figures can be played in as few as 3 hours. I've always wanted to try this, but have never had that many figures. You can also play a 3, 4, or more way free for all, with all sides fighting each other. You don't have to change any rules, it was designed to be able to do this. I've always had a soft spot for DHA and wish it could have been a little more popular. But at least I can still play any time I like! Hope you liked reading about this obscure game.

Tuesday, September 11, 2012

Elvish Retaliation

After the slaughter of the elves, the elvish king summoned Telor the Hippogriff rider to his court and begged him to take command of the counter-offensive. Telor was a controversial choice with a very mixed record of victory, defeat and running away, but the king knew that Lomsec, his trusty wizard would be there to take over if things went wrong. The elvish army set out and met the invading beastmen. The elvish army is Telor on his mighty Hippogriff, Caradryan the the hero and Lomsec the level 20 wizard. They command 5 silver helms and 16 warrior kindred armed with spears.
Telor, warrior kindred, silver helms, Lomsec in the background.

The beastly army is led by Zorn the chaos knight, Bazor the Beast Hero and Malagor the beastly shaman. They lead 4 mounted chaos warriors and 15 beastmen. Both armies are 1500pts.

Beastmen, then chaos warriors.

Elves on the left, beasts on the right. A magical tape
measure sits in the foreground.

Turn 1: The elves all advance. Lomsec casts a lightning bolt that kills three hideous beastmen. Malagor the beast shaman casts a fireball that slays 1 silver helm. Magic missiles are mighty indeed when they disallow armour saves!

Turn 2: Lomsec really earns his keep with a mighty lightning bolt that destroys 4 chaos warriors and wounds Zorn. Zorn charges into the elf warriors and challenges Caradryan to a duel. Zorns mighty frostblade easily sucks the life out of Caradryans soul, but the press of warriors is enough to force Zorn into a rout.
Caradryan lies still, a frozen husk.


Turn 3: Telor swoops after Zorn on his hippogriff, chasing him right off the battlefield. The Silverhelms fight the beastmen, pushing back and forth with no one able to get an advantage. Lomsec casts Cause Stupidity on the beasts, but they shrug off the effects.

Turn 4: The warrior kindreds and Telor charge into the beastmen as they fight with the silverhelms. The beasts fail their panic test and are all quickly slain or fled.

End game.

In all, a decent fun game, although it took as long to set up as it did to play! Lomsec was the most important warrior, single handedly destroying the beasts best unit.

Monday, September 10, 2012

The Lightning Raid of the Beasts of Chaos

After several years of quiet, trouble is brewing on the northern borders of the elf kingdom. A terrible storm of multi-coloured lightning and thunder that sounded like the bellowing of mad giants tore a hole in reality, allowing the beastman Malagor, Zorn the Slayer, and their fiends of chaos to launch a raid of the peaceful elves. Lomsec the magician and Duranbar the Hero set forth to defend their green valley.

Malagor, center, commands his minions to cross the bridge of joy.
Mounted chaos warriors on the right, a herd of beastmen on the left.

The elvish defenders do not arrive in time to block the bridge. Archers
on the left, warrior kindred in the center, silver helms with Duranbar on the
right. Duranbar has a mighty Hell-Honed Blade that can cut armour like wood, wood like it
was cheese, and cheese like it was some icky smelly gooey specialty cheese.
A 1000pt battle. The chaos army was not terribly chaotic with only a few minor mutations, none of which affected the battle at all.

Turn 1: Zorn leads his chaos warriors in an uncontested crossing of the bridge. The silver helms attempt to charge them, but fail and end up disordered for their effort. This was not good. The arrows of the archers bounce harmlessly off the chaos warriors heavy armour. Lomsec rushes forth to attempt a steal mind spell on zorn but it fails.

Turn 2: The chaos warriors charge the disordered silver helms, easily routing them in their disordered state. They flee, but all the other elves keep their cool. Zorn gleefully pursues the elves, slaying every silver helm himself. The beastmen crossed the bridge in an orderly fashion, much to the disgust of Malagor who prefers chaos to order. The archers continued to rain accurate archery on the chaos warriors, but failed in every case to penetrate their armour. Getting desperate, Lomsec casts steal mind on Zorn with all his remaining power - and succeeds! Zorn stares stupidly, his companions lead his horse by the reins.

Turn 3: The beastmen charge the warrior kindred spearmen, and fight them to a draw. The archers, undaunted, continued to shoot the warriors, and finally killed one! The foolish warrior had raised his visor to scratch the wart on his nose.

Turn 4: The chaos warriors charged the warrior kindred in the rear, causing the elves to fail their panic test and flee. At the this point the gods took pity and ended the game to prevent the wholesale slaughter of the remaining elves. Total victory for chaos.

The end, right before the elves fled in panic.
A fun, short game. I haven't played warhammer in over 2 months, so I spent my day off re-reading the basics of the rules and had a go.